Editing a Custom Dictionary
You can use the Spell Checker Driver Manager window to add, remove, or edit the words in a custom dictionary.
Editing the Custom and Exclusive Dictionary should be as the follow image shows:

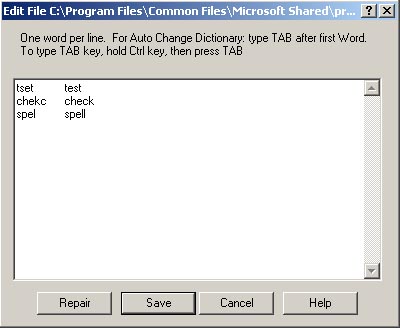
Editing the Auto Change Dictionary should be as the follow images shows:
To edit a custom dictionary:
- Select the custom dictionary that you want to edit from the list on the Options tab in the Spell Checker Driver Manager window.
- Press the Dictionaries button, In the Custom Dictionaries that appears, press the Add button, A list of the words appearing in the custom dictionary is shown. View the Edit File window.
- To add words: Type each word on a separate line, pressing the Enter key on your keyboard after each
line.
Note:Be sure to press your Enter key after the last word in the list. - To remove words: Delete the text for the word. Be sure to keep each remaining word on a separate line and to have a blank line at the end of the list.
- To edit words: Change the text as necessary. Be sure that each word remains on a separate line and that a blank line appears at the end of the list.
- To repair the custom dictionary: Press the Repair button. If any errors exist in the custom dictionary,
an error message is displayed and you will be told how to fix the problem.
Note: If you have Microsoft Word on your computer, you should use Word to repair the custom dictionary, instead of using the Spell Driver Manager window. - Press the Save button to save your changes and close the window.
Copyright ⌐ 1995-2003, CompuBridge, Inc. All rights reserved.